
End-to-end testing automation pipelines
Create your first pipeline
Section titled “Create your first pipeline”This guide walks through a complete automated flow:
- Setup a wallet
- Generate a credential offer
- Receive the credential
Pipelines combine:
- Maestro → mobile automation
- StepCI → service interaction
Step 1 — Integrate an Issuer, generate a credential offer (StepCI)
Section titled “Step 1 — Integrate an Issuer, generate a credential offer (StepCI)”Add a Credential Deeplink step.
- Go to the Issuers/Credentials page https://credimi.io/my/credential-issuers-and-credentials
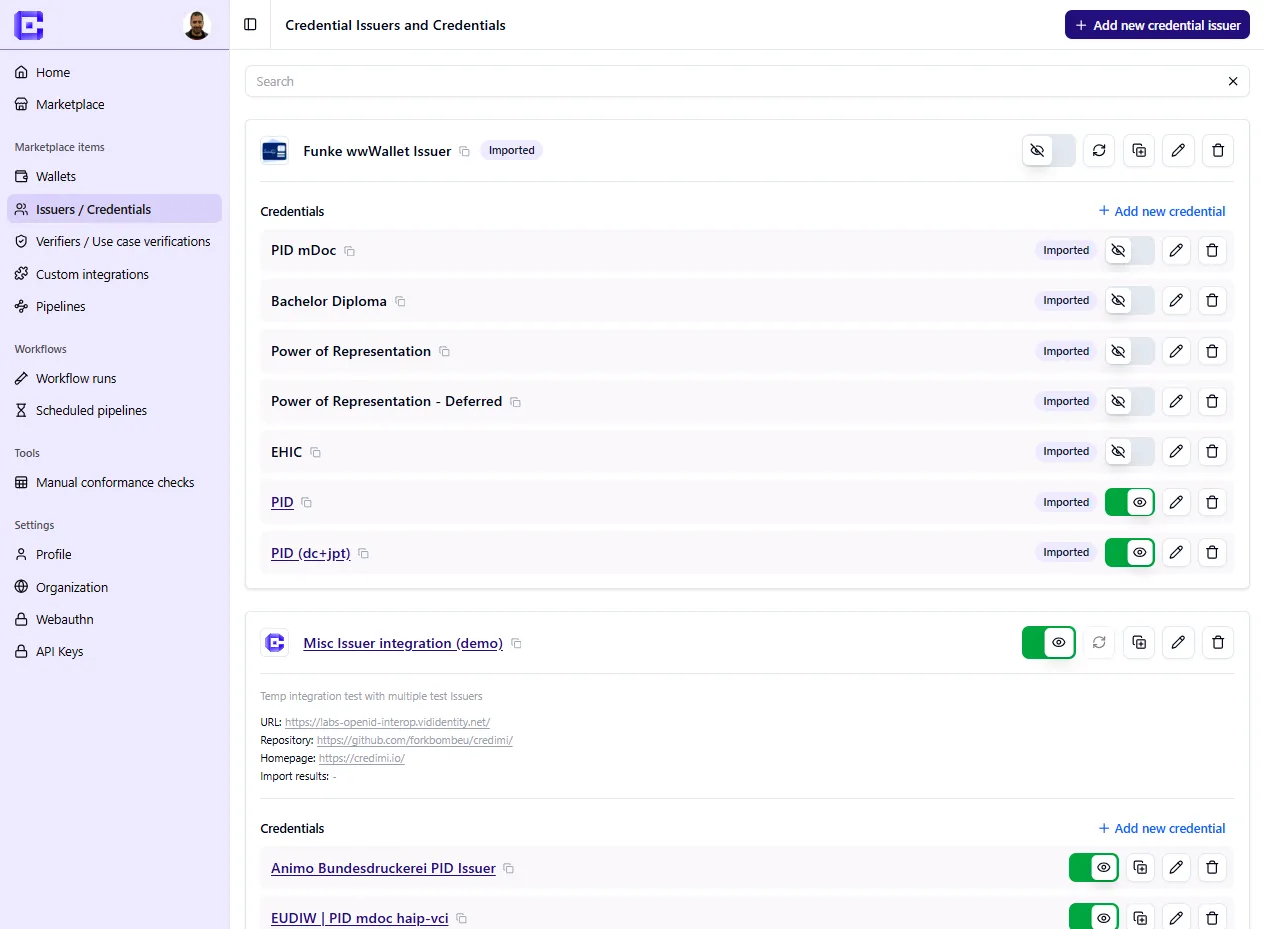
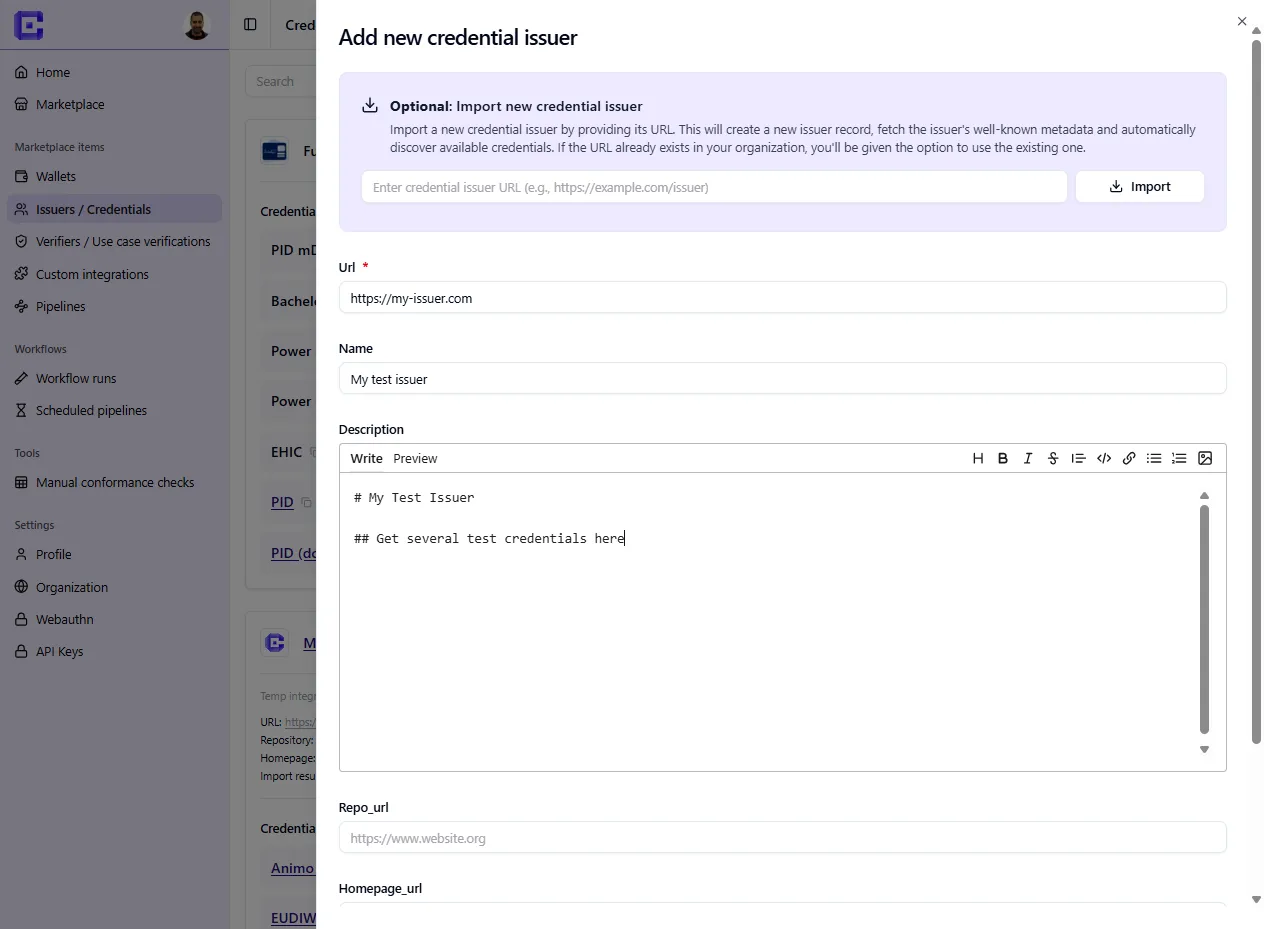
- Click on + Add new credential issuer
- If your Issuer supports static .well-known, you can import it here to auto-populate the issuer
- Then click on + Add new credential: here write a StepCI script to call an issuer and generate a credential offer.
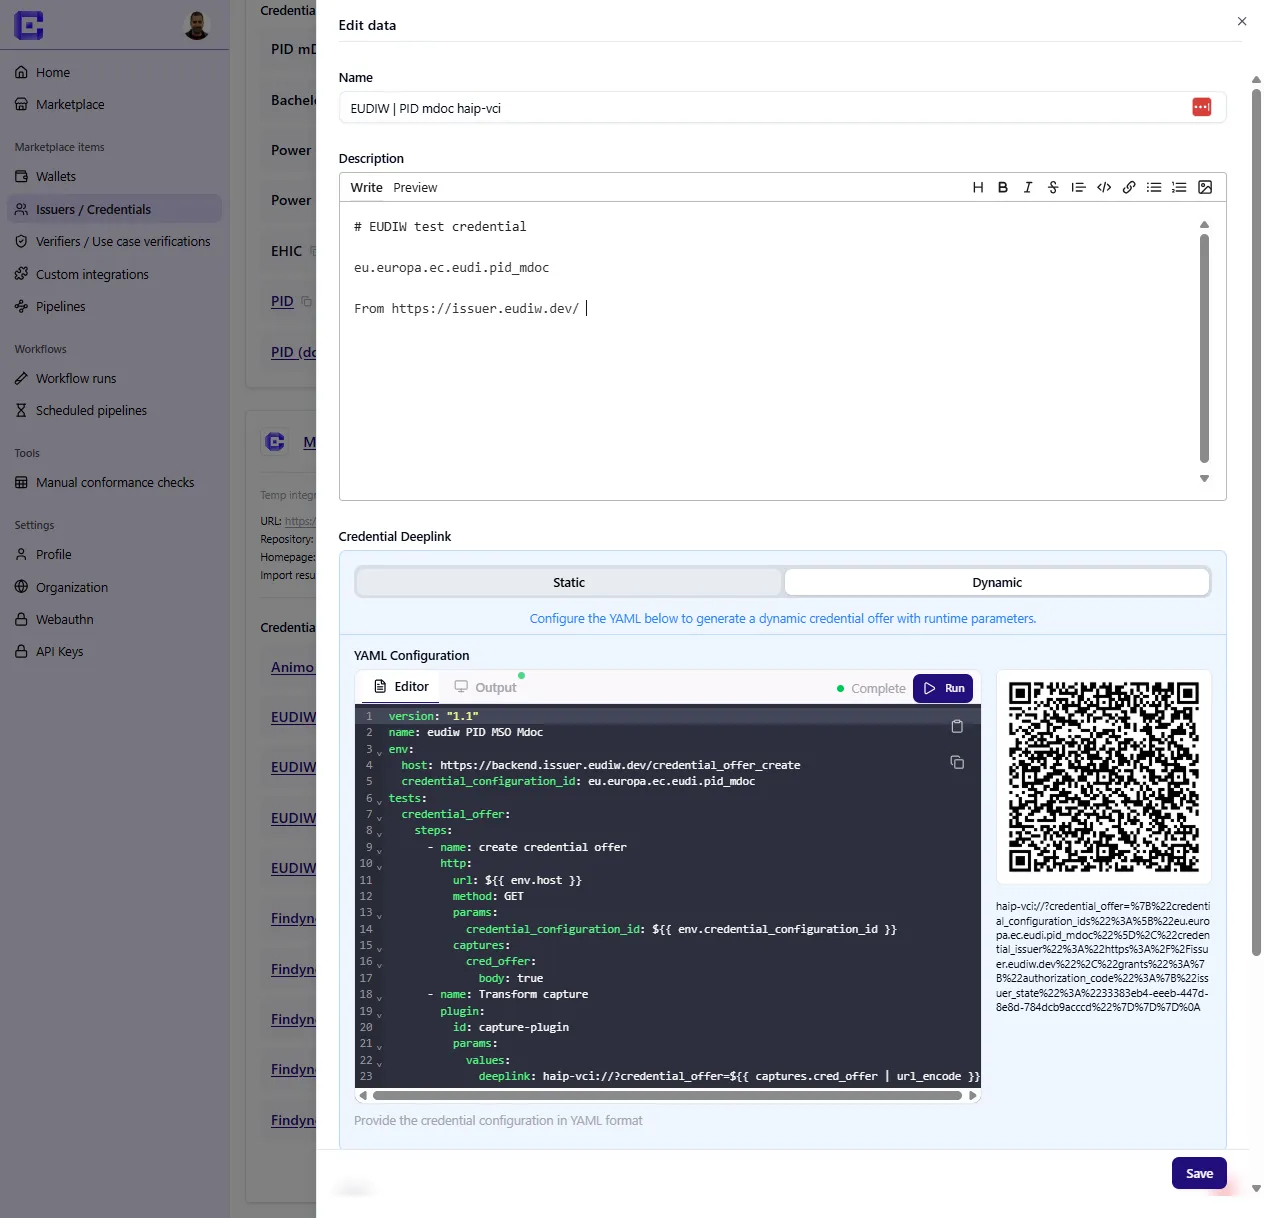
The output is a deeplink:
haip-vci://...Or:
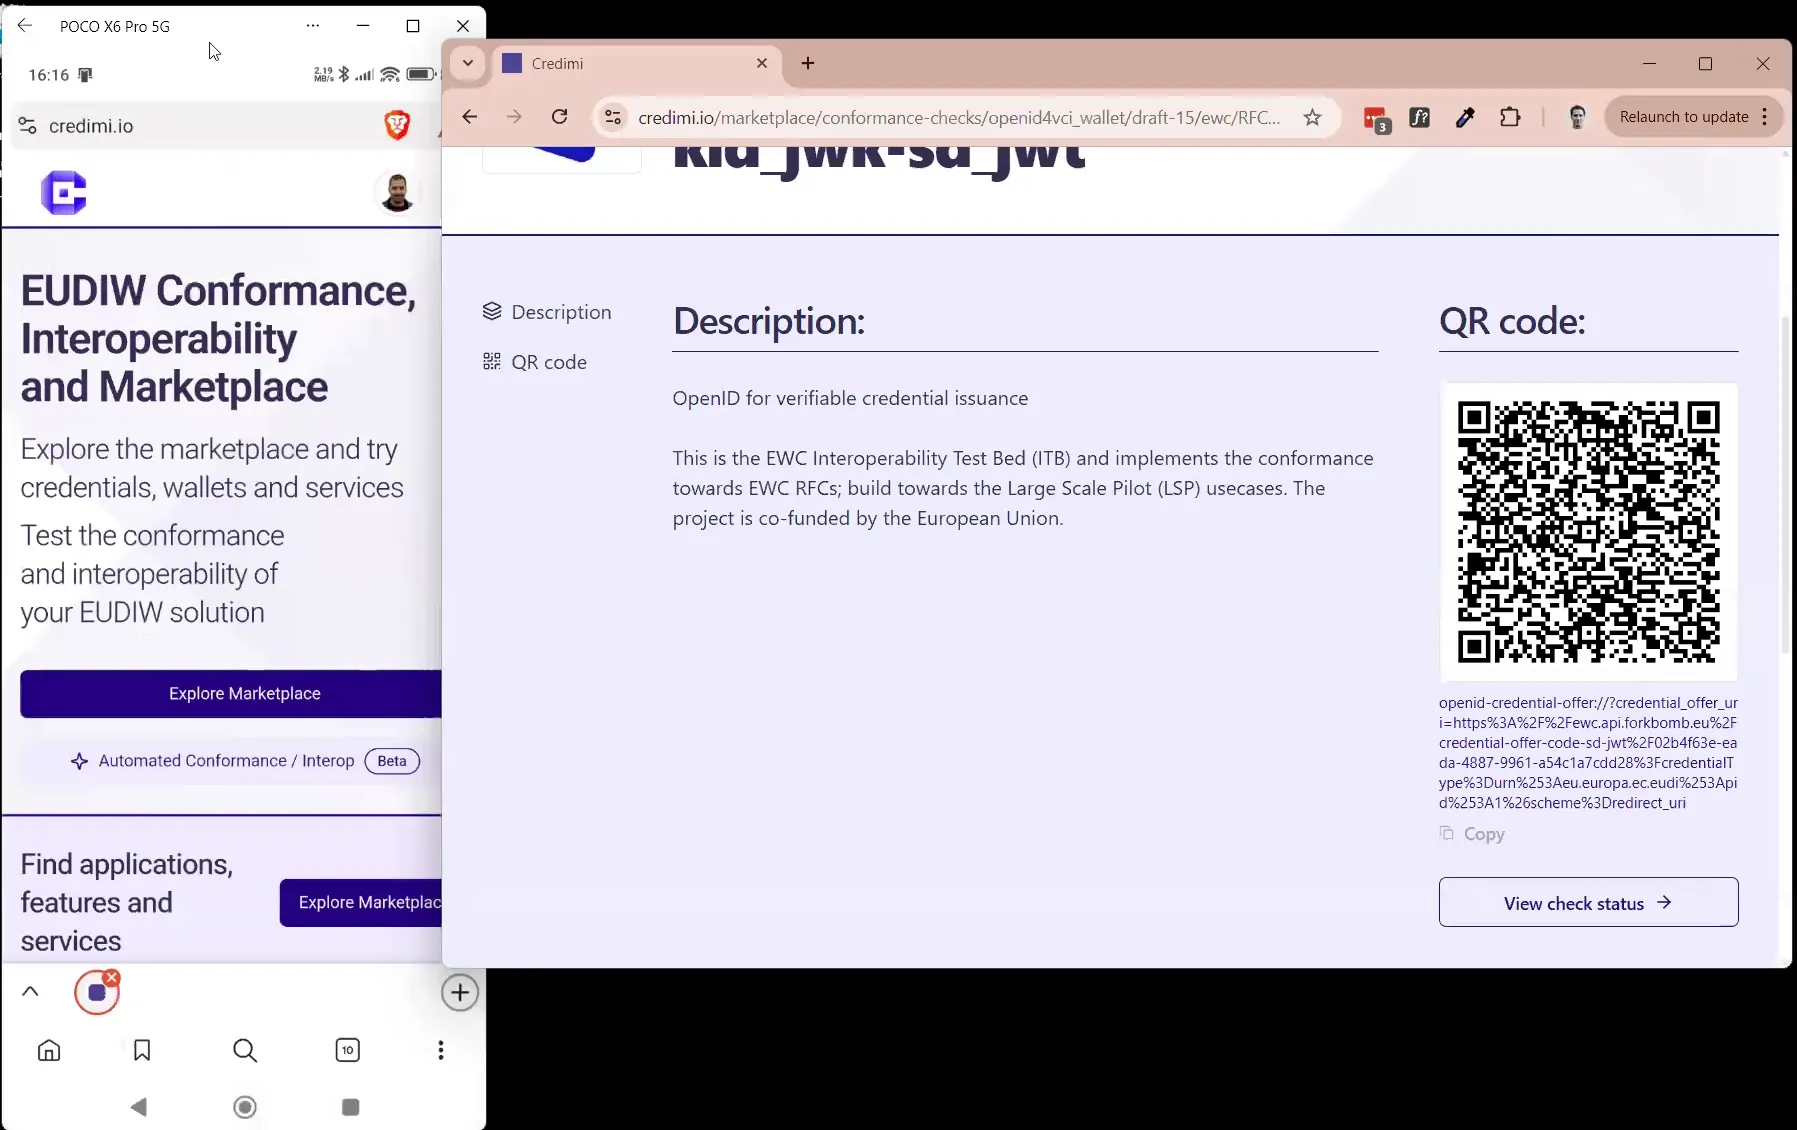
openid-credential-offer://If you publish the integration, you can preview the StepCI output directly in the Hub at https://credimi.io/hub?tab=credential-issuers-and-credentials :
- QR code
- clickable deeplink
Step 2 — Add a Wallet
Section titled “Step 2 — Add a Wallet”- Go to the Wallets page https://credimi.io/my/wallets
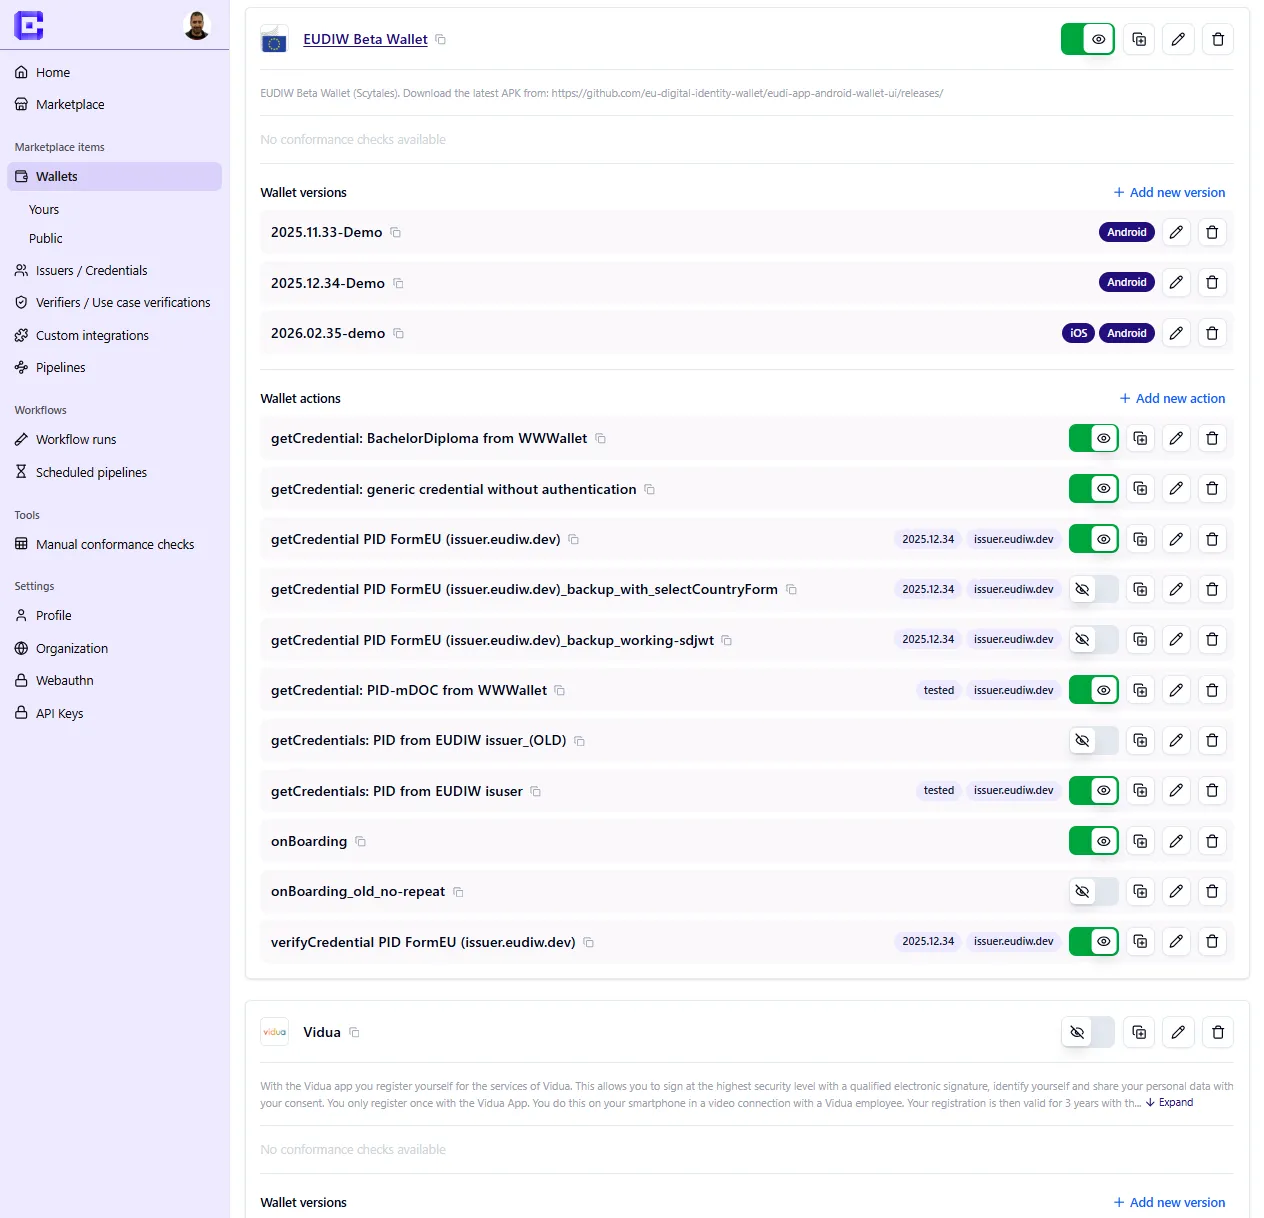
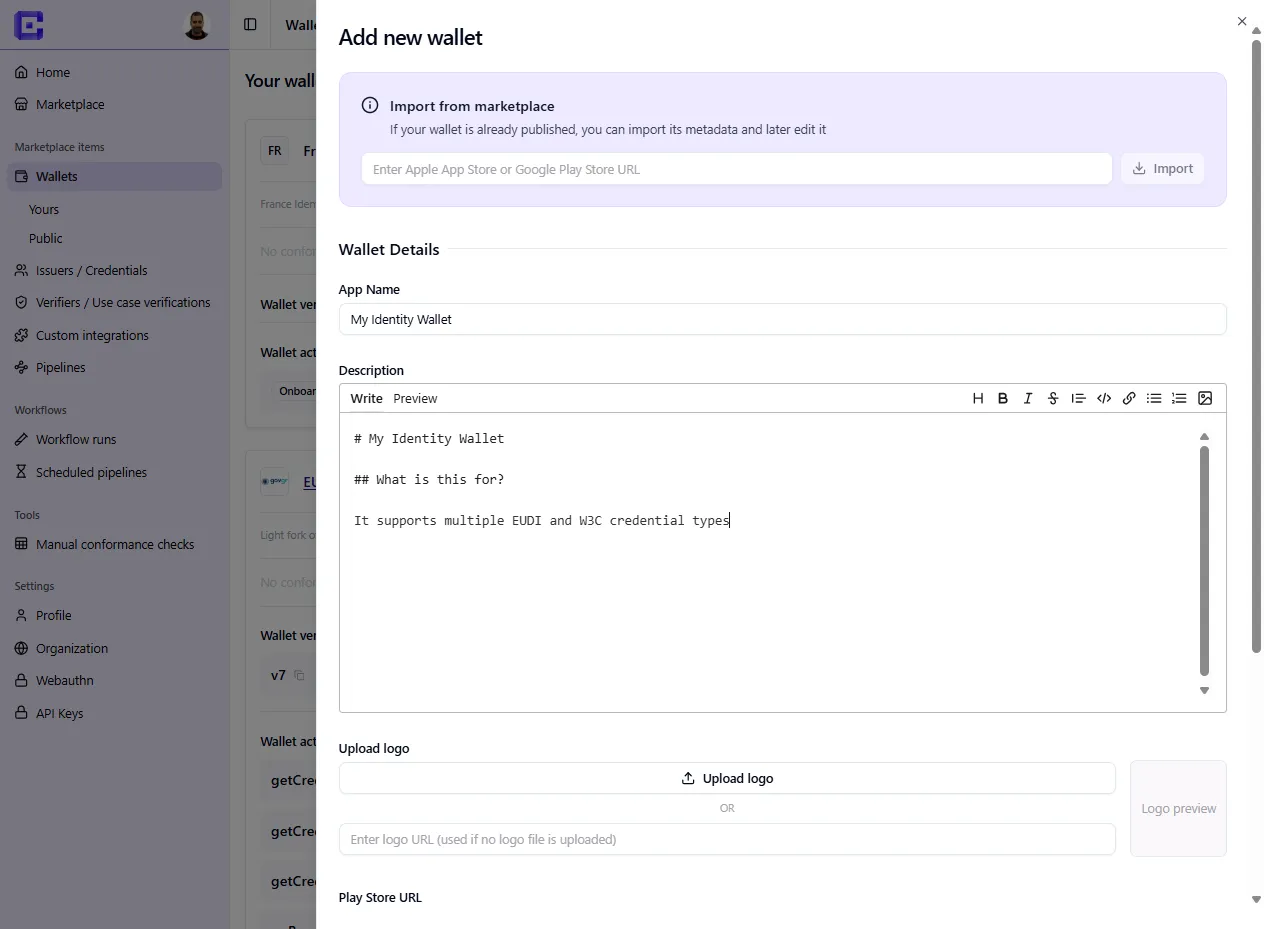
- Click on + Add new wallet and add the metadata. This can be visible on the Hub if you publish the Wallet.
- If the Wallet is already on the Android/iOS stores, you can import the metadata from there
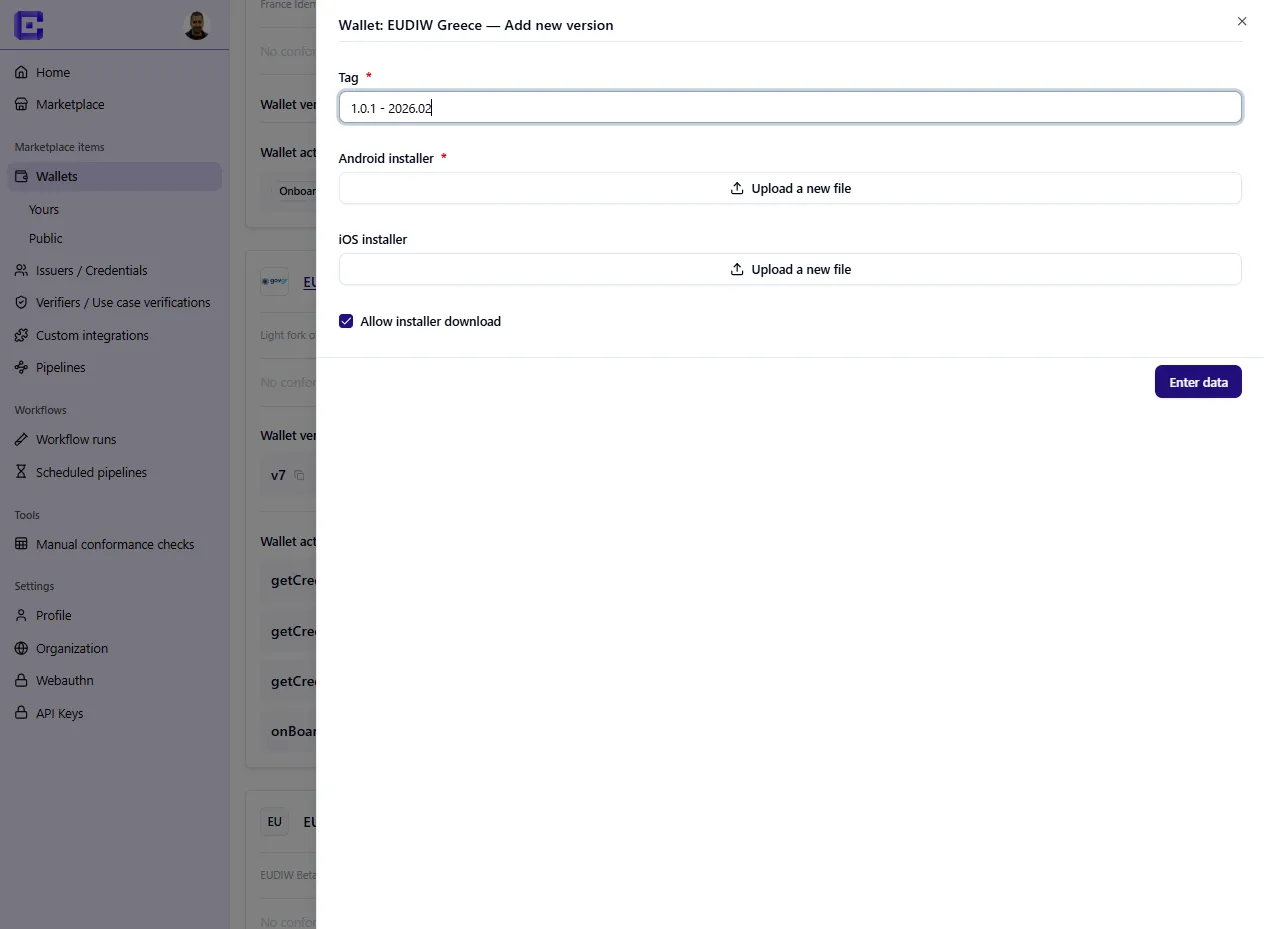
- Important: add a Wallet version and upload the .apk and iOS packages. This enables the pipeline engine to automatically install the Wallet on the device, emulator, or simulator for automated testing. The Version can optionally be made downloadable from the Hub, but this is not required for automated testing to work.
Add the Wallet automation steps using Maestro:
- open the wallet
Step 3 — Prepare the wallet (Maestro)
Section titled “Step 3 — Prepare the wallet (Maestro)”Add the Wallet automation steps using Maestro:
- open the wallet
- complete onboarding (PIN, permissions)
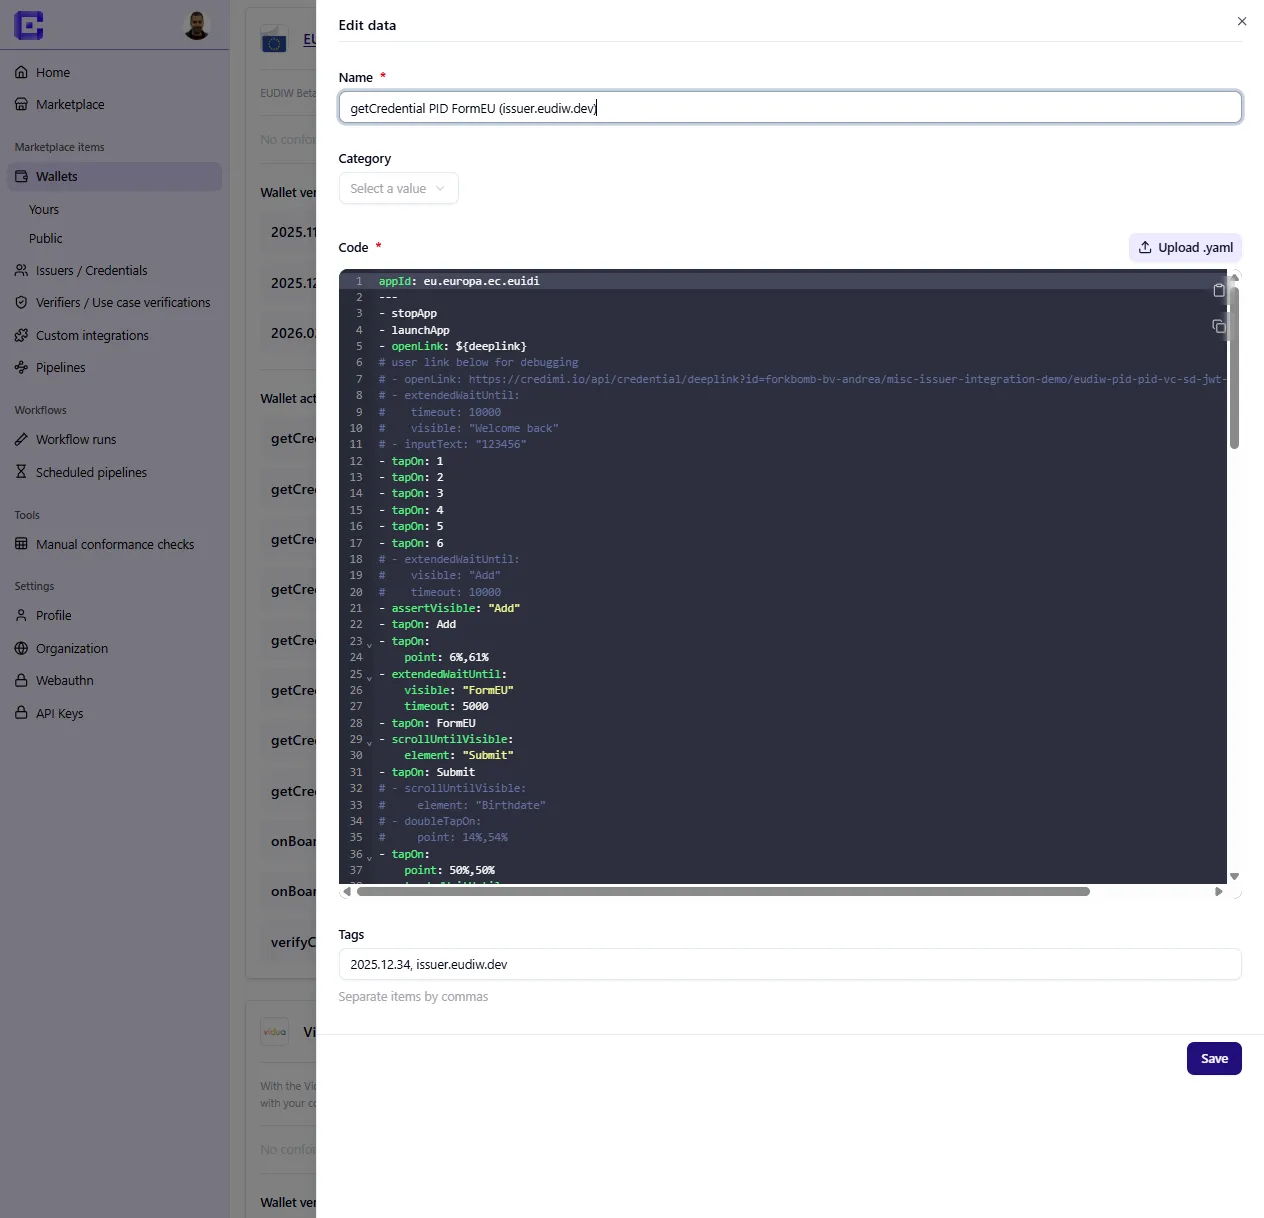
What is Maestro?: it’s mobile testing automation framework, that we integrated into credimi.io
You probably want to use Maestro Studio and look at Maestro docs.
Step 4 — Receive the credential (Maestro)
Section titled “Step 4 — Receive the credential (Maestro)”Add another Wallet step.
This consumes the deeplink:
- stopApp- launchApp- openLink: ${deeplink}
This triggers the wallet to complete issuance.
Step 5 — Create a pipeline
Section titled “Step 5 — Create a pipeline”Go to the Pipelines page https://credimi.io/my/pipelines
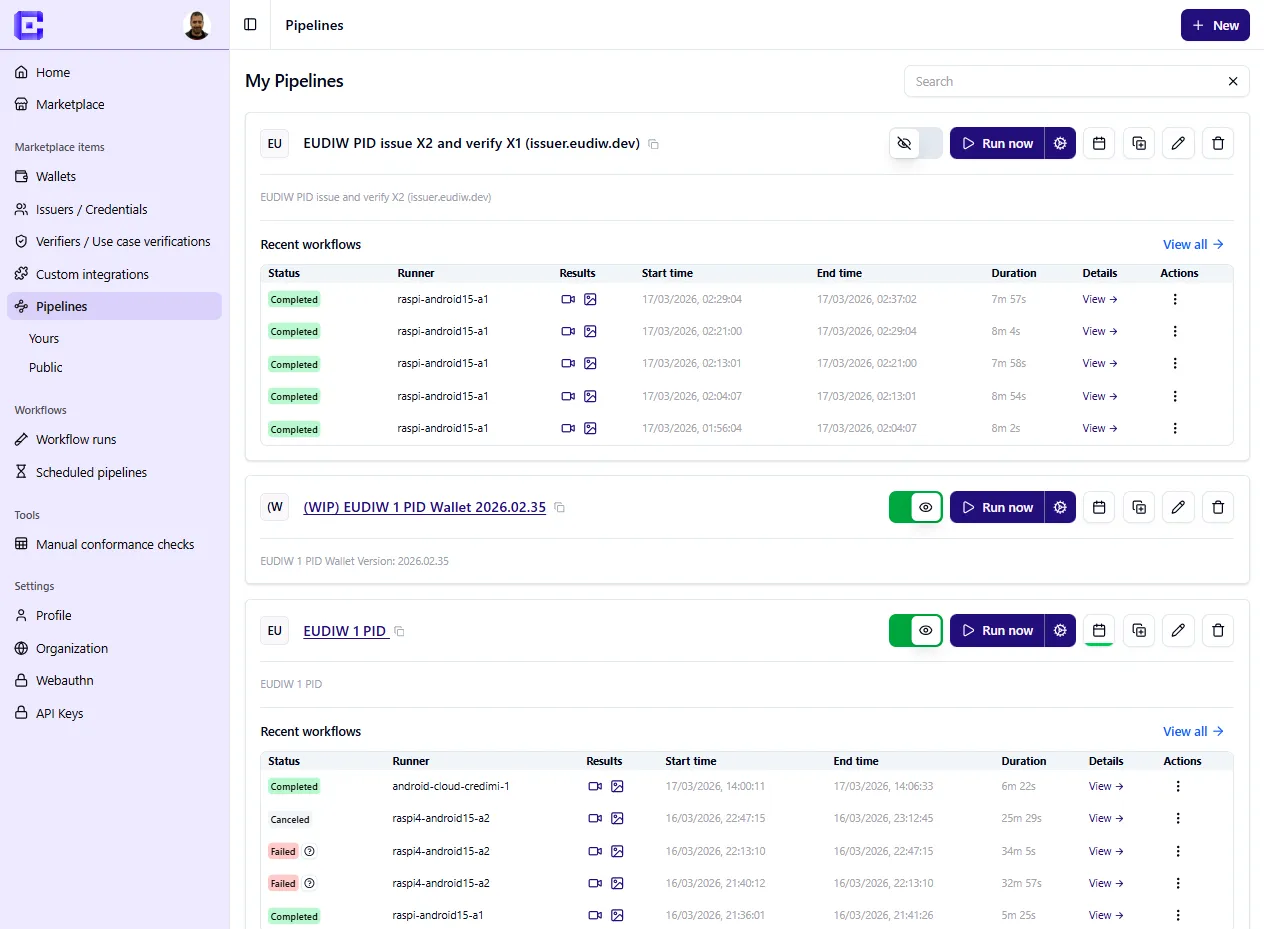
Click on New to ppen the pipeline editor and create a new pipeline.
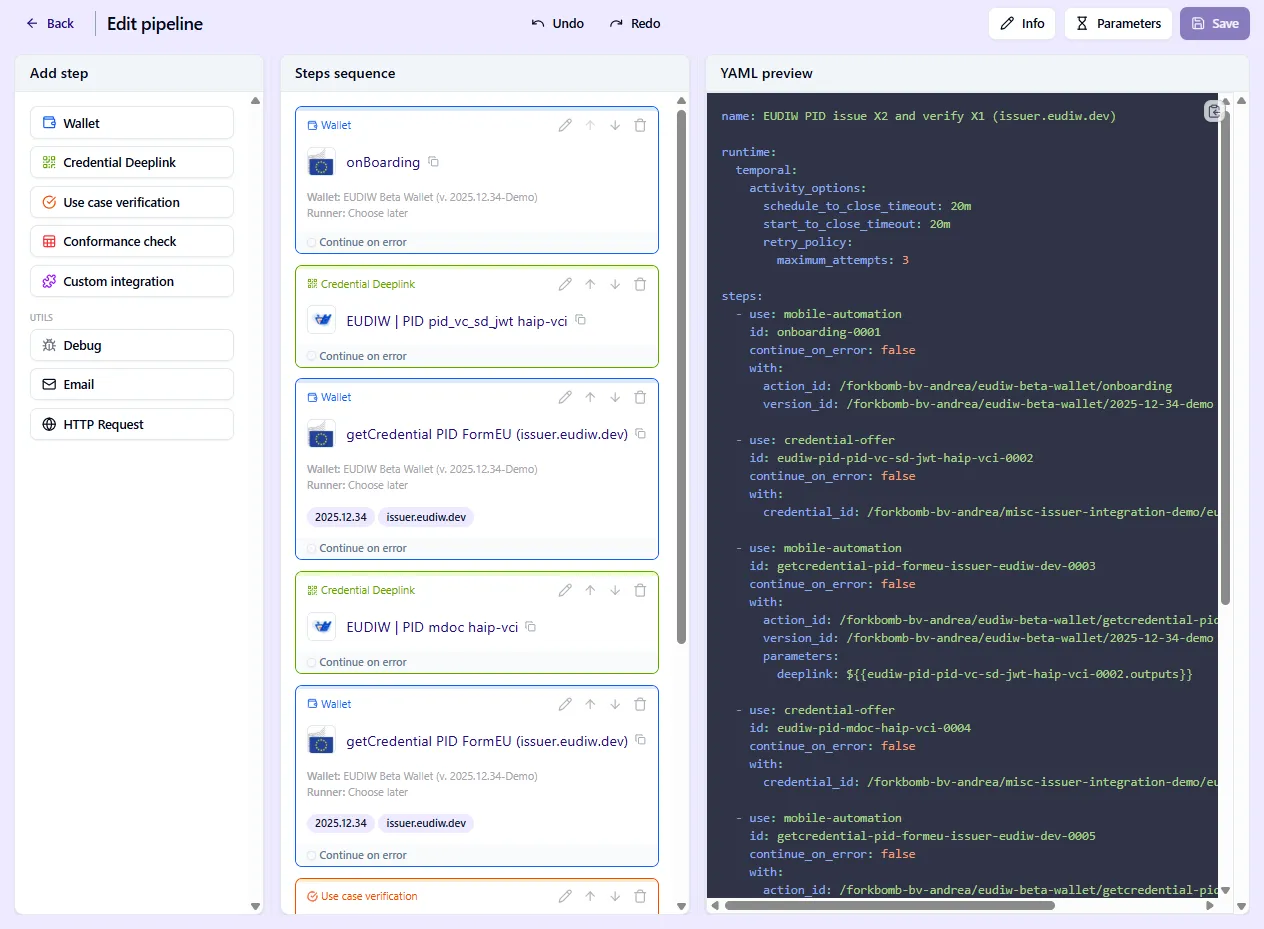
You define a sequence of steps executed automatically.
Step 6 (Advanced) — Add a Verifier, integrate a use case verification flow
Section titled “Step 6 (Advanced) — Add a Verifier, integrate a use case verification flow”In the same fashion as you created an Issuer and integrated the Credential issuance flow using StepCI, you can integrate a Verifier.
- Click on Verifiers to land on https://credimi.io/my/verifiers-and-use-case-verifications
- Click on + Create verifier
- Add a StepCI script to integrate a use case verification flow
- Create a Maestro script to execute the verification on the Wallet
You can then add the use case verification in the Pipeline, similarly to how you did for the Credential Issuance.
Step 7 (Advanced) — Add a Conformance Check
Section titled “Step 7 (Advanced) — Add a Conformance Check”You can also add a Conformance Check in the Pipeline, this is also done in the pipeline editor:
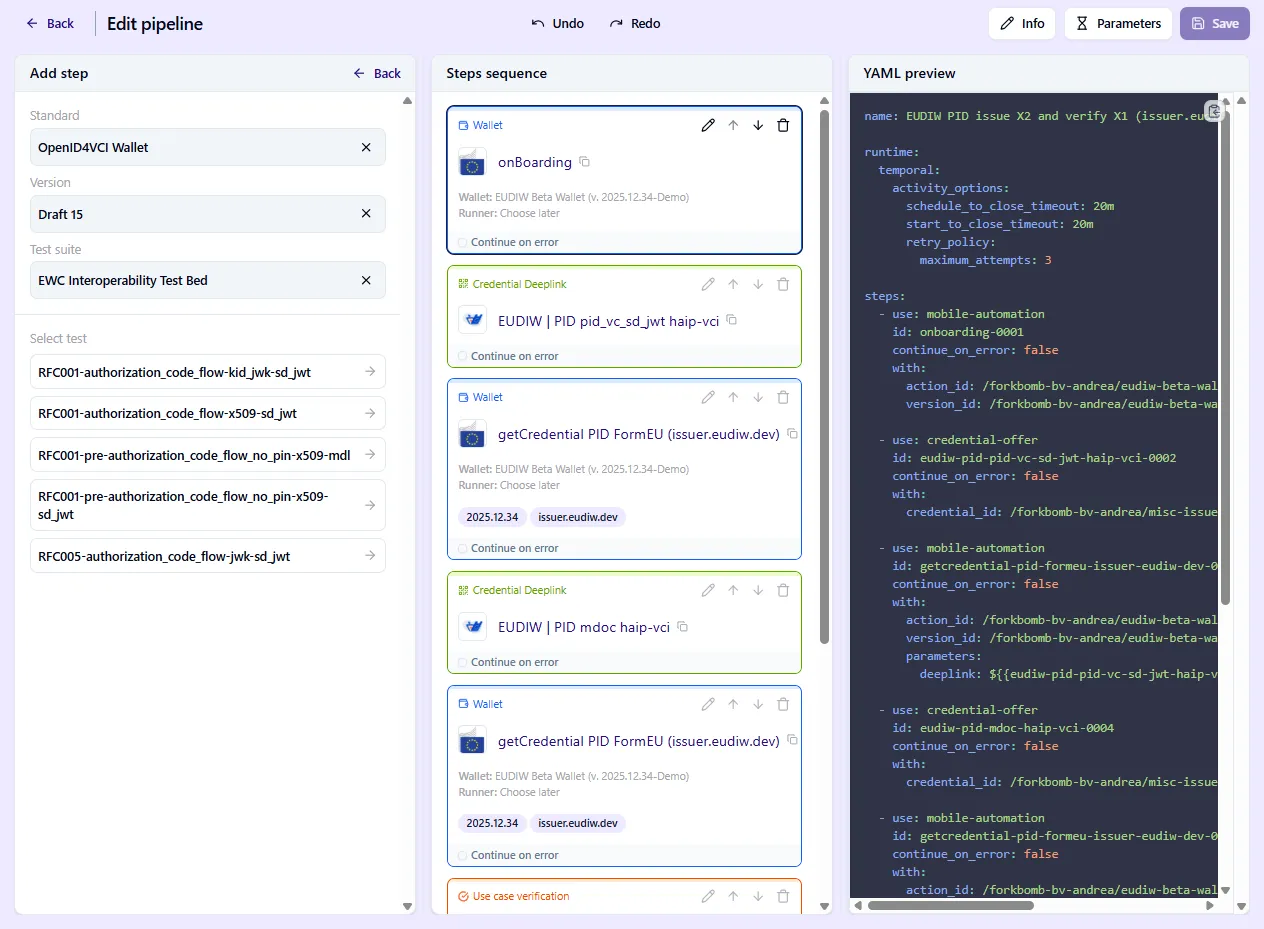
Step 8 — Run the pipeline
Section titled “Step 8 — Run the pipeline”Execute the pipeline from the pipelines list:
- Click on the ⚙️ gear next to the ▶️ Run button, to select the runner you want the mobile automation to be executed on:
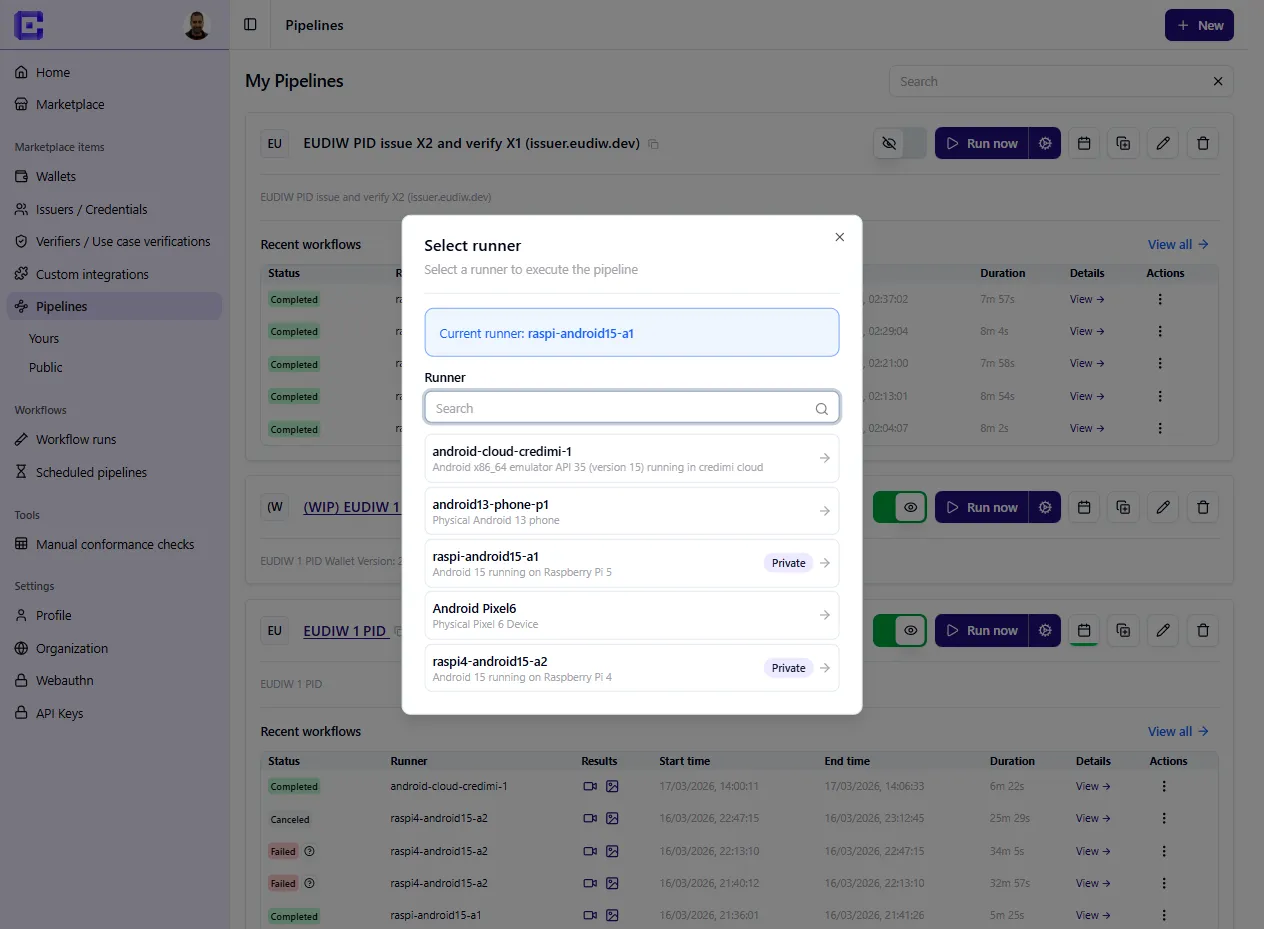
- Click on the ▶️ Run button to launch the pipeline.
The system will:
- start a device
- execute steps sequentially
- pass outputs between steps
Step 9 — Inspect execution
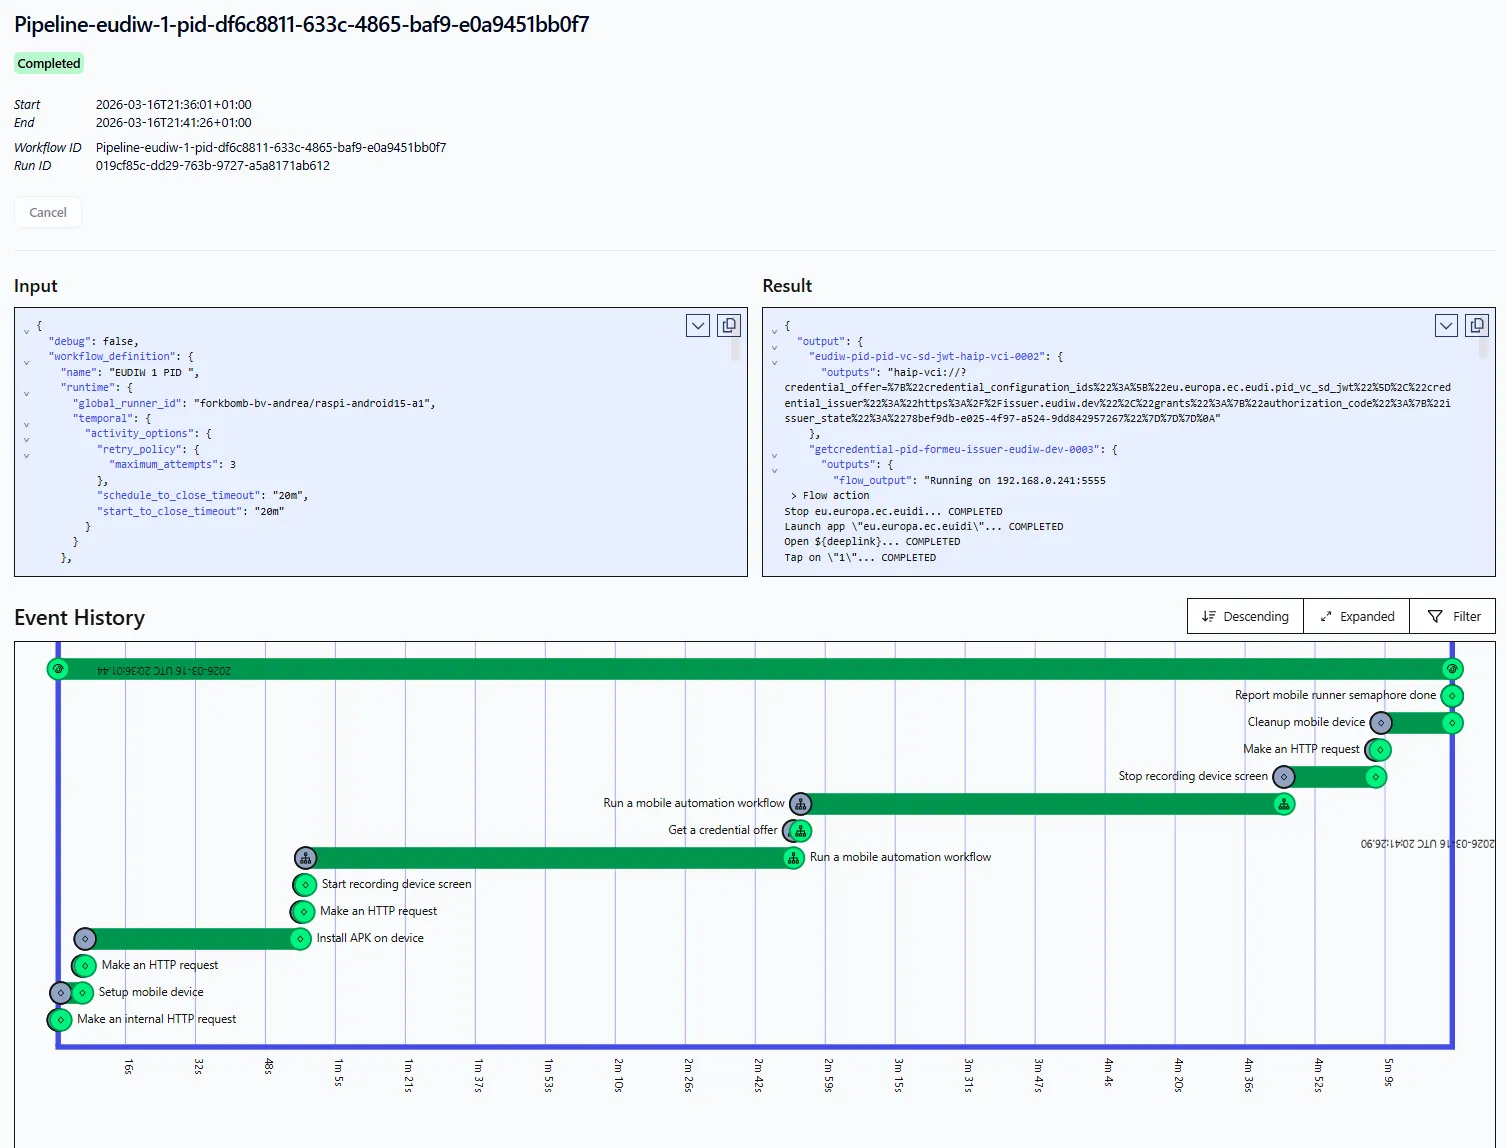
Section titled “Step 9 — Inspect execution”During or after the pipeline execution you can click on the view-> link to see a detailed timeline of the execution:
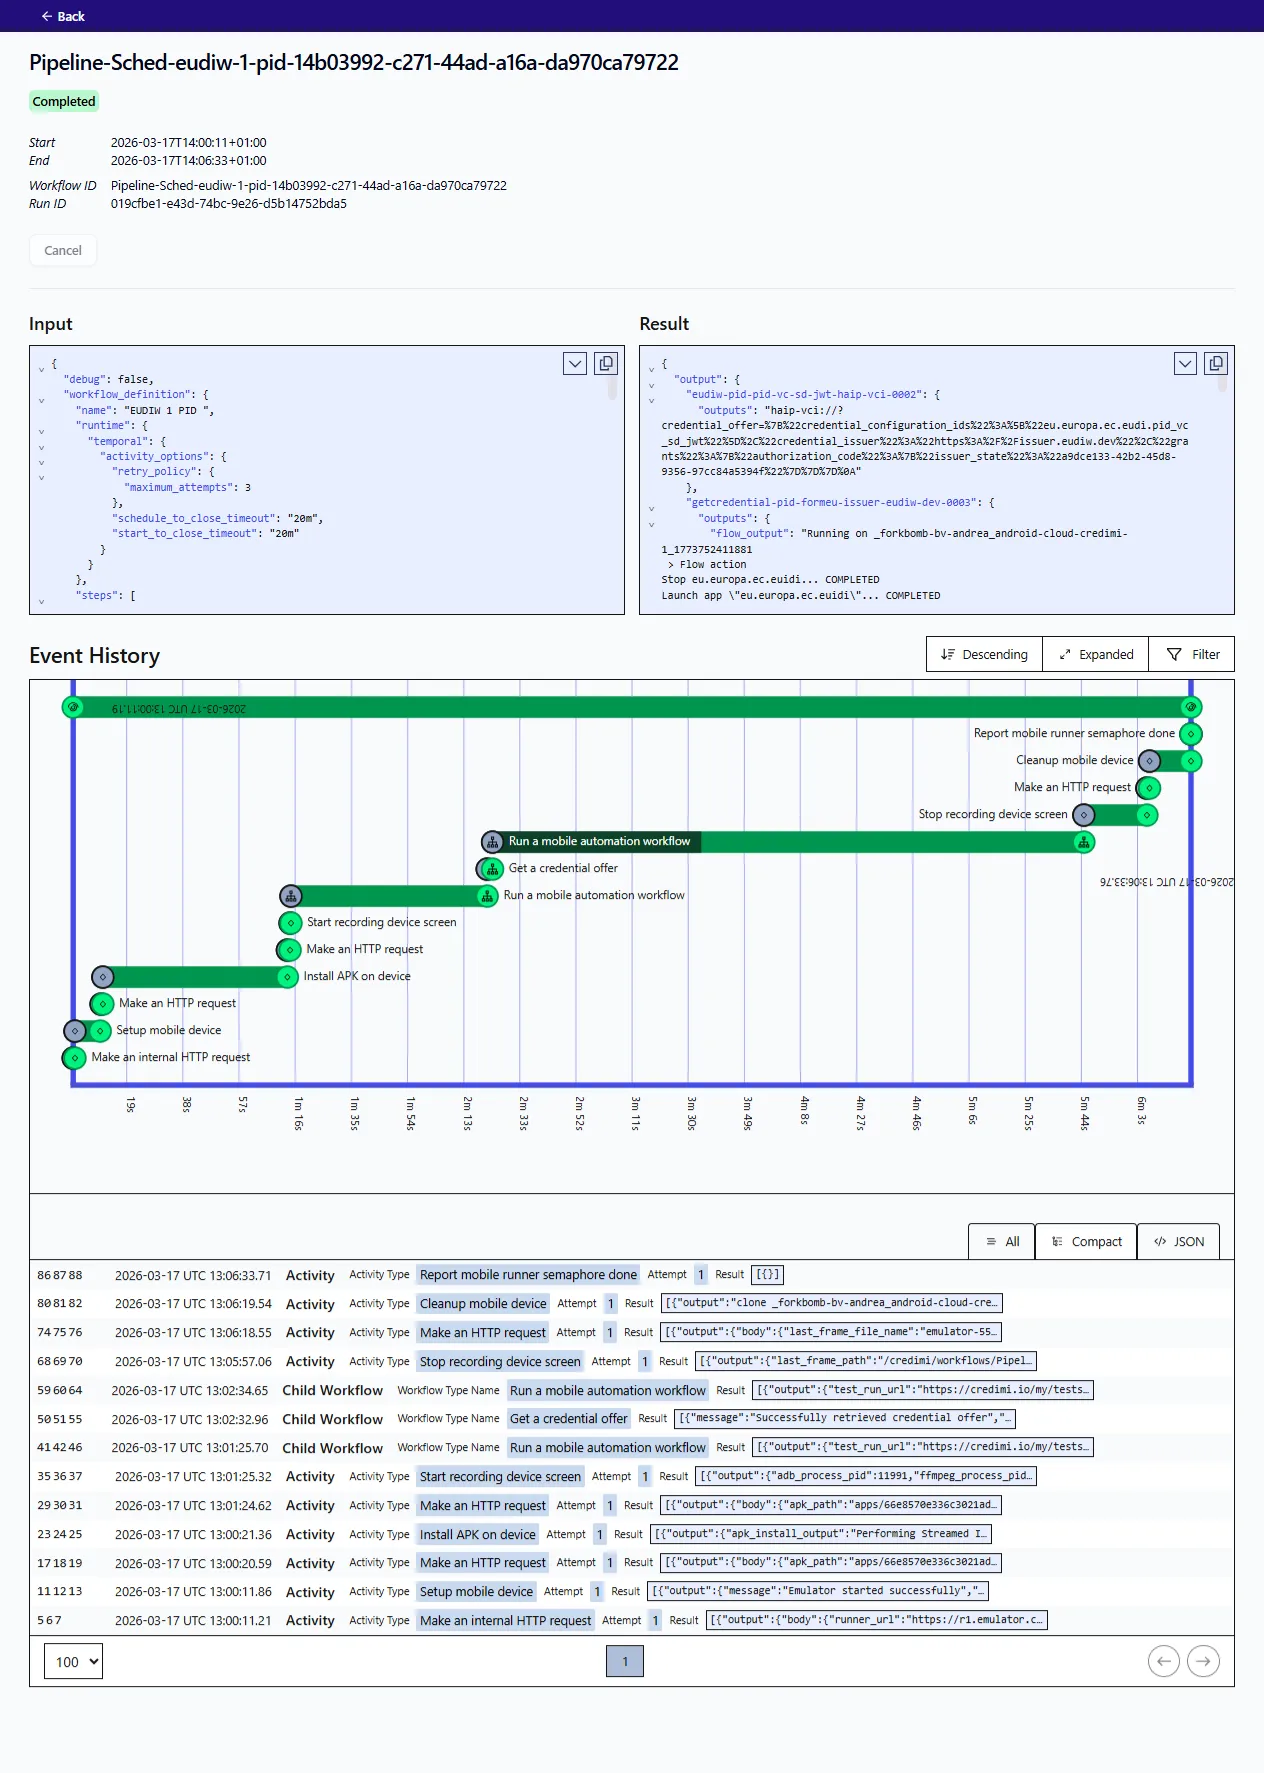
You can inspect:
- StepCI calls
- Maestro actions
- device lifecycle
After the pipeline completede execution you can also view the video, screenshot and logs output captured during the execution.
Summary
Section titled “Summary”Pipelines allow you to:
- automate credential issuance and verification flows
- connect services (StepCI) and UI (Maestro)
- run reproducible end-to-end tests
You can extend pipelines by chaining multiple steps to test full identity scenarios.